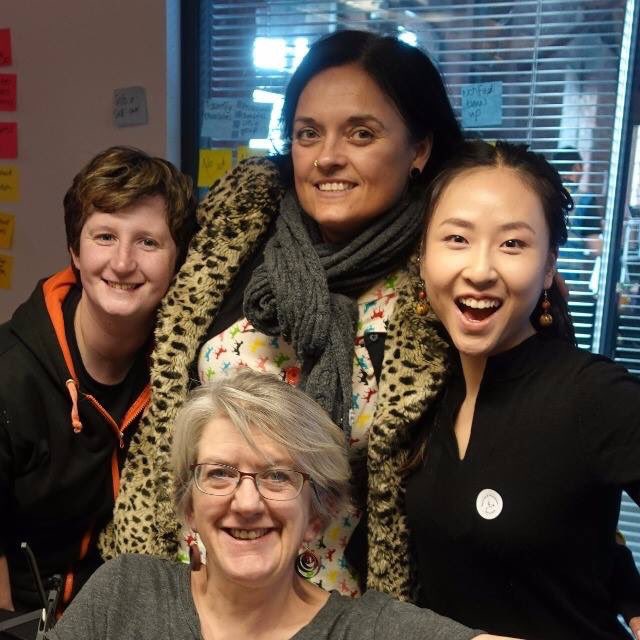
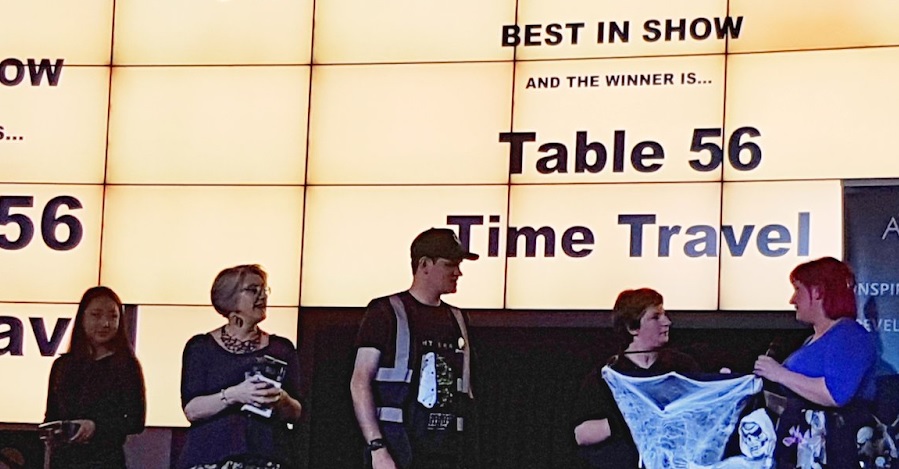
Category: Code

Converting a .Net Standard console app into a .Net Core console app

Converting a .Net Standard console app into a .Net Core console app

If you have a simple .Net console app and you’d like to convert it into a .Net Core app so that you can run it from the command line on any platform (as long as you install .Net Core), here’s what to do:

  • Remove the following files and folders from your project:
    • Bin folder
    • Obj folder
    • Packages folder
    • Properties / Assemblyinfo.cs
    • config
  • Create a new temp folder and run this command in that folder: dotnet new console
    • Take the csproj file created by that command and use it to replace the csproj file in your original project (using the name of the original csproj file).
    • !! If your original csproj file was in a nested folder, the new csproj file will have to be in the root.
      • But your program.cs file can stay where it was.
      • Or you can create a *.sln folder at the root level and add references to any nested csproj files.
        • To create a sln file: dotnet new sln
        • To add a csproj file (in a nested tests folder) to your sln file: dotnet sln add .\tests\tests.csproj
    • Command line: dotnet restore
    • Now you can build and run the new project from the command line: dotnet run
  • Check the old project for packages to include:
    • Look in packages.config
    • For instance, if you see a line that looks like this:
      • <package id=”NUnit” version=”3.11.0″ targetFramework=”net452″ />
    • …you need to run this on the command line: dotnet add package nunit -v 3.11.0
    • !!! If NUnit is one of the packages, you need to do some extra actions – see Adding NUnit tests to a .Net Core console app.
  • Gotchas:
    • You can’t build and run a console app in Visual Studio if the code is in Google Drive. You’ll get a very generic uninformative error – “Unable to start program … refresh the process list”.
    • If you try to add the NUnit package manually, you may get errors. Follow the actions in Adding NUnit tests to a .Net Core console app to fix.
      • Otherwise you may get the following errors:
      • 1) “Unable to find tests” Fix this with the following command (check version – this was Oct 2018): dotnet add package Microsoft.NET.Test.Sdk -v 15.7.2
      • 2) “Program has more than one entry point defined”. This is fixed by adding the following sub-element to a <PropertyGroup> element in your csproj file:
      • 3) “No test is available”. Fix this by adding the NUnit3TestAdapter package (at time of writing – Oct 2018 – this was version 3.10.0).

See also the following post:

Adding NUnit tests to a .Net Core console app

Adding NUnit tests to a .Net Core console app

(I’ve learnt a lot more since I originally wrote this (for instance, how to debug your tests), so this is an updated version).

This weekend I was part of a team that took part in the annual Hack Manchester hackathon (and we won Best in Show! Yay!). We used .Net Core for our back end code, and we got stuck in the middle of the night trying to add tests to our solution. It turned out the solution was pretty simple, so I’m documenting it here.

Intro

  • To get started with a vanilla ASP.Net Core app + WebAPI: Getting Started with .Net Core, ASP and WebAPI
  • There are two versions below. The one you choose will probably depend on things like deployment pipelines. If you are doing anything other than a quick hack, Version 1 is probably better.
  • To be perfectly honest, the only reason I moved from one to another was because I (mistakenly) thought I couldn’t debug the tests or run them in an IDE unless they were in a separate project. It turned out that the only thing preventing me was that I hadn’t installed the relevant extension (see “Debug the tests / run the tests from an IDE” below).
  • Version 1:
    • Place tests in a separate project/folder
  • Version 2:
    • Keep all the tests in same folder/project as the source. This is quicker / simpler.

Version 1 – keep tests in separate folder/project

  • This version places tests in a separate project / folder. This is probably better if you want a deployment pipeline.
  • NB If your source is currently in your root folder, then you’ll need to move it into a separate folder (eg a src folder). This is easy:
    • Close down any IDEs you have running
    • Create a new src folder
    • If you don’t have a *.sln file, create one by opening the project in Visual Studio or running the command: dotnet new sln
    • Edit your solution file so that your csproj is prefixed by its new folder name
      • For me that meant changing ” TimeTravelApi.csproj” to “src/TimeTravelApi.csproj”
    • Move everything except *.sln into your new src folder
  • Create a separate tests folder in your root folder
  • Navigate to your new tests folder
  • Create the nunit project:
    • There are two ways of doing this.
      • The first way is to run this command: dotnet new “NUnit 3 Test Project”
      • The second way is to manually add three new packages: NUnit, Microsoft.NET.Test.Sdk and NUnit3TestAdapter – see below for how to do this manually.
  • Add a reference to your source project:
    • Run this command (replace “YourProject” with your project name): dotnet add reference ../src/YourProject.csproj
    • If you get an error about “incompatible targeted frameworks” then:
      • Go into your tests.csproj and change the .Net version from 2.0 to 2.1 like this: <TargetFramework>netcoreapp2.1</TargetFramework>
      • Run this command to upgrade the nunit version: dotnet add package nunit -v 3.11.0
      • ! This works in Oct 2018, but it might be different in the future!
    • Add your new tests project to the solution:
      • Navigate back up to your root folder
      • Command: dotnet sln add ./tests/tests.csproj
    • Write and run some tests (see “Write and run some tests” below)

Version 2 – keep tests in same folder/project as source

  • This version keeps all the tests in same folder/project as the source. This is quicker / simpler if you are trying to keep things small and simple.
  • Add the necessary packages:
    • You can run the separate package commands on the command line (see below), but you’re probably better off using the dedicated nunit command.
    • Dedicated nunit command:
      • Command line: dotnet new “NUnit 3 Test Project”
    • Separate commands for each package (check versions – this was written Oct 2018):
      • Command line: dotnet add package nunit -v 3.11.0
      • Command line: dotnet add package Microsoft.NET.Test.Sdk -v 15.7.2
      • Command line: dotnet add package NUnit3TestAdapter -v 3.10.0
    • Add the following sub-element to a <PropertyGroup> element in your csproj file:
      • This: <GenerateProgramFile>false</GenerateProgramFile>
    • Write and run some tests (see “Write and run some tests” below)

Write and run some tests

  • Write some tests
    • At the bottom of this post is a skeleton you can use – it’s all you need for a functioning test
    • Run the tests from the command line: dotnet test -v normal
    • Debug the tests / run the tests from an IDE:
      • In Visual Studio Code:
        • Install the .Net Core Test Explorer extension (from Preferences | Extensions)
          • Mac: in the Code menu
          • Windows: in the File menu
        • Now you will see “Run test” and “Debug test” options above every test.
      • In Visual Studio (Windows):
        • Install the NUnit test adaptor:
          • Tools | Extensions and Updates
          • Select online on the left
          • Search for NUnit
          • Find NUnit 3 Test Adaptor
          • Click Download
          • Close down Visual Studio AND Visual Studio Code
          • You will get a VSIX installer dialog
        • Run the tests:
          • The Test menu gives you options for running tests
          • Then Test | Windows | Test explorer will show you the results
        • Debug tests:
          • Test | Windows | Test explorer: right-click on a test and choose Debug selected tests

A skeleton NUnit test:

using NUnit.Framework;
namespace KiwilandRouteApplication.Tests
{
  [TestFixture]
  public class DummyTests
  {
    [Test]
    public void DemoTest()
    {
      Assert.True(true);
    }
  }
}
Hack Manchester 2018 – The Challenges

Hack Manchester 2018 – The Challenges

I couldn’t find anywhere all the Hack Manchester 2018 challenges / prizes were listed together, so I’m putting them all on one page for easy comparison.

! I’m not sure if they’re all there yet – there might be more to come, so keep an eye on the Hack Manchester site (scroll down to the “THE CHALLENGES” – yellow section just before the schedule).

Follow the links below to find out about the sponsors and see more detail / explanation about the challenges:

WebApp UKBest in Show. (Our team came second for Best in Show last year. Just sayin’.)

MediaBurst: “The most bizarre use of ClockworkSMS!.”

Dunnhumby: “use data to make the consumer experience… less than optimal.

Centre For Biological Timing: “make technology work for our body clocks rather than against them … hack your body clock!

Avecto: “create a digital solution to help protect or inform friends and family of the issues around Cyber Security.

AND Digital: “Can clever tech help turn passenger misery into passenger delight?

GCHQ: “think locally: utilise the fantastic open data sources available about Greater Manchester to improve the safety of the general public.

Screen Shot 2018-10-12 at 14.07.51

Feelin’ Groovy (“Unable to resolve class” or “Configure Groovy SDK”)

Feelin’ Groovy (“Unable to resolve class” or “Configure Groovy SDK”)

I was working with some Groovy scripts in IntelliJ today – a first for me. I came up against a couple of simple getting-started issues… I’m just making notes about them here. There are notes here on two errors I came across: “Unable to resolve class” and “Configure Groovy SDK”.

  1. “Configure Groovy SDK”:
  • On command line:
    • This: brew install groovy
    • Then to run a script: groovy path/to/file.groovy
  • In IntelliJ:
    • Install the groovy plugin
    • Open the folder containing the scripts
    • When it says “Groovy SDK is not configured for module ‘my-module’” or “Configure Groovy SDK”
      • Click the link with the “Configure Groovy SDK” message (top right in IntelliJ)
      • Click Create
      • (Find your Groovy installation:
        • On the command line: brew ls groovy
        • This will give you something like this: /usr/local/Cellar/groovy/2.5.2/bin/groovy
        • Then you need to find your libexec folder – probably at same level as bin folder – in my case it’s here: /usr/local/Cellar/groovy/2.5.2/libexec)
      • Find the libexec folder, select it and click open
      • More here: https://stackoverflow.com/questions/46123890/configuring-groovy-sdk-within-intellij-idea
    • Now you can run a Groovy script by clicking the big green Play button, top right
    • To pass parameters into a script:
      • Top right, click the little down arrow next to the name of the script
      • Click Edit configurations
      • Fill in Program arguments


2. “Unable to resolve class” 

  • This can happen when your classes are in a package and you try to run your script from the command line.
  • It will start in the folder the class is in, then from there it will look for a further folder structure – eg if your package is clare.is.cool then it will look for the folder structure clare/is/cool from the path of the groovy script.
  • The solution is to set the classpath on the command line when running the script, and start further back in the directory tree.
    • For instance if your class is here: c:\overall\path\clare\is\cool\MyScript.groovy
    • Then you run it like this: groovy -cp c:\overall\path c:\overall\path\clare\is\cool\MyScript.groovy
    • (or if you have already navigated to c:\overall\path\clare\is\cool, you can just run groovy -cp c:\overall\path MyScript.groovy)

More here: https://stackoverflow.com/questions/45072923/groovy-unable-to-resolve-class